While our winters are often mild, we occasionally get an extreme cold spell that can do a lot of damage. To lessen the chance of unwelcome repair surprises in the spring, you can winterize your sprinkler system and your home’s water pipes.
Winterizing your sprinkler system
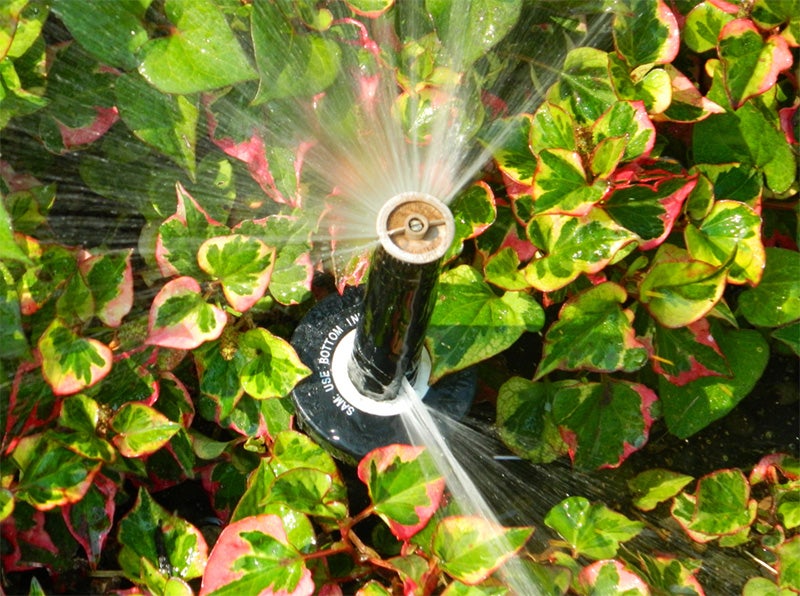
The main purpose of winterizing a sprinkler system is to keep components from breaking. Damage occurs when water freezes and expands inside sprinklers, pipes, and valves. Therefore, enough water has to be drained from the system to prevent breakage before cold weather hits.
How much drainage is enough?
The general rule of thumb is more than 50% of the water should be drained to protect a sprinkler system from freeze damage, but since water may collect in some areas rather than draining evenly, a system is not completely free of the risk of freezing as long as any water remains. Therefore, the best way to winterize an irrigation system is to mechanically introduce air into the system to push the water out. This method is called “blowing out” the sprinkler system. However, many systems locally are not equipped for this and for safety reasons, it is best done by someone familiar with the process.
Winterization Steps
1
Close the irrigation main shut-off valve. This should be located somewhere along the main irrigation line before the backflow prevention device.
If you do not have a shut off valve, you should consider installing one, preferably at the point where the irrigation line is attached to the household water line, and cover it with a valve box. DO NOT use the valve of a backflow device as the main shut-off. These valves need to be left partially open, so they can drain too.
2
Locate any manual drain valves, and open them. Many sprinkler systems have manual or automatic drains placed at low points in the system so that water drains out by gravity.
However, no system is ever installed so perfectly sloped that all areas will be drained evenly. Thus, water will pool in the low areas of the system. Automatic drains can become stuck closed or open, causing them to stop draining or waste a lot of water during the watering season. In addition, valves and sprinkler bodies never completely drain by gravity. Draining the sprinkler system can be further complicated if the sprinklers have check valves in them. These are often utilized on a sloped property to keep water from draining out of the system unnecessarily after every watering cycle. Check valves keep water from draining, in the same way that water will stay in a straw if you put your finger on top of it and pull the straw out of the water.
3
To remove water from sprinklers and pipes in this situation, you need to let air in so water can come out. To do this, prop up every sprinkler riser within the sprinkler zone at the same time. This can be accomplished by tightening a rubber band around each riser, keeping them propped up while the water drains out of each sprinkler (see an alternative to this manual drain method below).
4
Winterize the backflow by opening the test cocks 1/8-turn and closing the ball valves 1/8-turn, or leaving it at a 45-degree angle.
5
Insulate all valves, especially any that are above ground. Even a small amount of water, when frozen, can cause a large amount of damage to them.
6
Winterize your automatic controller. This is done by disconnecting the common wire from the controller. In the controller, where the valve wires connect, the common wire will be marked as “COM” or just “C”.
Skipping this step can undo all the winterizing work if the controller accidentally energizes the system, possibly freezing pipes, icing up sidewalks, and causing other problems. It is best to not simply unplug the controller during winter to keep the microprocessors warm.
Blowing Out the System
One of the surest ways to winterize a system, and an alternative to manually propping up every sprinkler riser to get water to drain, is by using an air compressor to mechanically introduce air into the system and push the water out. Again, this is a task best done by a qualified professional, but if you have the appropriate equipment and feel comfortable doing it yourself, we have provided some suggestions to performing this task more safely and effectively.
The biggest and most common mistake made when attempting a blowout is using the wrong type of air compressor. Blowouts require air in terms of volume (measured in cubic feet per minute, or CFM) as opposed to pressure (measured pounds per square inch, or PSI). The compressor should produce a minimum of 60-100 CFM for systems with 2” piping and smaller (which includes most residences and small businesses) at 50 PSI.
Air coming from compressors with less volume will most likely pass over, or through the water, preventing it from draining. In addition, uncontrolled high air pressure is dangerous and may cause parts of the system to literally blow apart. That is why it is extremely important that one should never stand over or near any sprinkler or valve when a compressor is running.
SAFETY FIRST!
Wear ANSI-approved safety eye protection! Extreme care must always be taken when blowing out a sprinkler system with compressed air. Never stand over or near any sprinkler or valve when a compressor is running. Serious personal injury may result if you do not follow these recommendations; contact a local irrigation specialist for assistance.
The generally advised sequence of steps to perform a blowout on an automatic system is as follows:
1
Make sure the main shutoff is closed.
2
Turn on the air compressor, to build pressure to 50 PSI. If you have a powerful machine, make sure you have it throttled down to avoid any issues.
3
Set the controller’s station run times for 2-3 minutes and start the controller, either semi-automatic or automatically, depending on the model.
4
Hook up the air compressor to the system. The connection is accomplished through a quick coupler valve or hose bib on the main line of the system. A Schrader valve is another method to connect to the system, but it is more restrictive. Backflow manufacturers recommend not using the test cocks on their devices for the purpose of a blowout.
Also, be aware that over-heating of plastic elements in your system may occur. Be observant and turn off the compressor for a while if something feels too hot.
5
Observe the water coming out of the sprinklers. Before the last station stops running, turn off, or disconnect the compressor. Never run a compressor without an open valve.
6
Repeat the whole process a few times to ensure the maximum amount of water has been evacuated from the system.
7
Lastly, disconnect the common wire in the controller as described previously.
For more information, please contact Cody at 541-774-2436, or by email: conserve@medfordwater.org.
Other resources:
hunterindustries.com/winterizing-your-irrigation-system
rainbird.com/documents/turf/ASC_Fall00.pdf
Winterizing Your Home and Water Pipes
Amid our mild and fairly dry winters in Southern Oregon, we do occasionally get extreme cold spells, and knowing how to prevent problems can therefore be important. The expense and inconvenience that can result from frozen pipes is one we hope to help you avoid.
Below are some tips to consider before and after the cold hits.
Before the Cold Hits:
Locate your water shutoff valve now and confirm that it turns easily; don’t wait until an emergency to find out. In our area, often the only shutoff is next to the water meter.
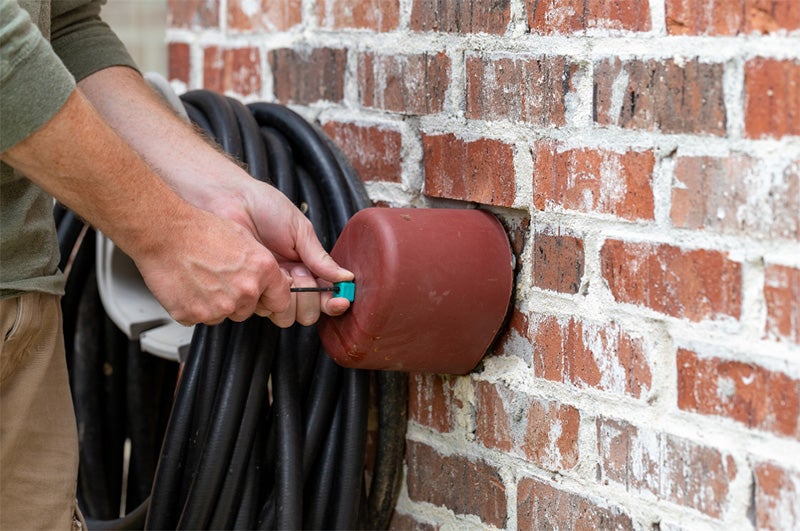
Insulate plumbing (hot water pipes too) in unheated areas such as crawl spaces, garages and outdoors.
Disconnect garden hoses in the fall before freezing temperatures arrive. Place insulation caps on hose bibs.
Cut cardboard or foam pieces that can temporarily be used to seal crawl space vents during very cold weather.
If you will be going away during cold weather, leave the thermostat set no lower than 55 degrees F.
Insulate any pool equipment that is exposed to the weather (especially the backflow assembly if you have an automatic fill-line).
During Freezing Weather:
Heat all rooms with plumbing fixtures, particularly those with plumbing on outside walls. Open cabinet doors under sinks to let heat in. If placing light bulbs in vulnerable areas, make sure they are not near combustibles.
Keeping a trickle of water running during extremely cold times can help prevent pipes from freezing. This is most effective with faucets that are farthest from the point where the main water line enters the house, or on outside walls.
Open the meter box during extreme cold only if necessary to turn water off. Close the lid as quickly as possible, as cold air can freeze the meter.
Should a pipe freeze, never thaw it with an open flame. Use a hair dryer, heat lamps or space heaters.
If you’re away, ask a friend or neighbor to check your house daily during cold spells and take these actions on your behalf.
For more information, please contact Cody at 541-774-2436, or by
email: conserve@medfordwater.org.